Quickstart - Your first agent
Connect Slack or Discord, plug in an LLM provider, attach rules and skills, then deploy your first agent and start a conversation in minutes.
This page walks you from a blank account to a deployed agent you can talk to from the web app, Slack, Discord, or the API.
There are three stages:
- Connect integrations. The LLM provider is required. Slack, Discord, and GitHub are optional.
- Set up artifacts (optional). Skills, rules, and MCP tools you want to share across agents.
- Create and deploy an agent.
Step 1 - Connect integrations
Open Settings → Integrations.
LLM provider (required)
Pick one - this decides which agent harness and models you can use.
- Anthropic - Claude Code harness, Claude models.
- Codex - OpenAI's Codex harness and models.
- OpenCode Zen - OpenCode harness with multi-provider model support.
See Connecting your LLM provider for managed-pool vs. bring-your-own-key details.
Slack and Discord (optional)
Connect either or both so you can talk to agents from a Slack channel or Discord server.
Skip this if you only need the web app or API.
GitHub (optional)
Two reasons to connect GitHub:
- Codebase access - give an agent access to specific repos so it can read code, push branches, and open PRs.
- Configuration repo - point Nairi at a repo that holds your skills, MCPs, and
AGENTS.md. Nairi reads any files in the repo it's running in - for example, the Claude Code harness picks up.claude/skills/automatically.
See Connecting GitHub.
Step 2 - Set up artifacts (optional)
If you want skills, rules, or MCP tools shared across multiple agents, configure them at Settings → Artifacts before creating the agent.
- Skills - reusable capability packages, from the Marketplace or your own.
- MCP Tools - external tool servers (databases, CRMs, observability, internal APIs).
- Rules - long-lived instructions the agent should follow when relevant.
You can skip this and attach artifacts to an agent later.
Step 3 - Create your first agent
Open Fleet and click New agent.
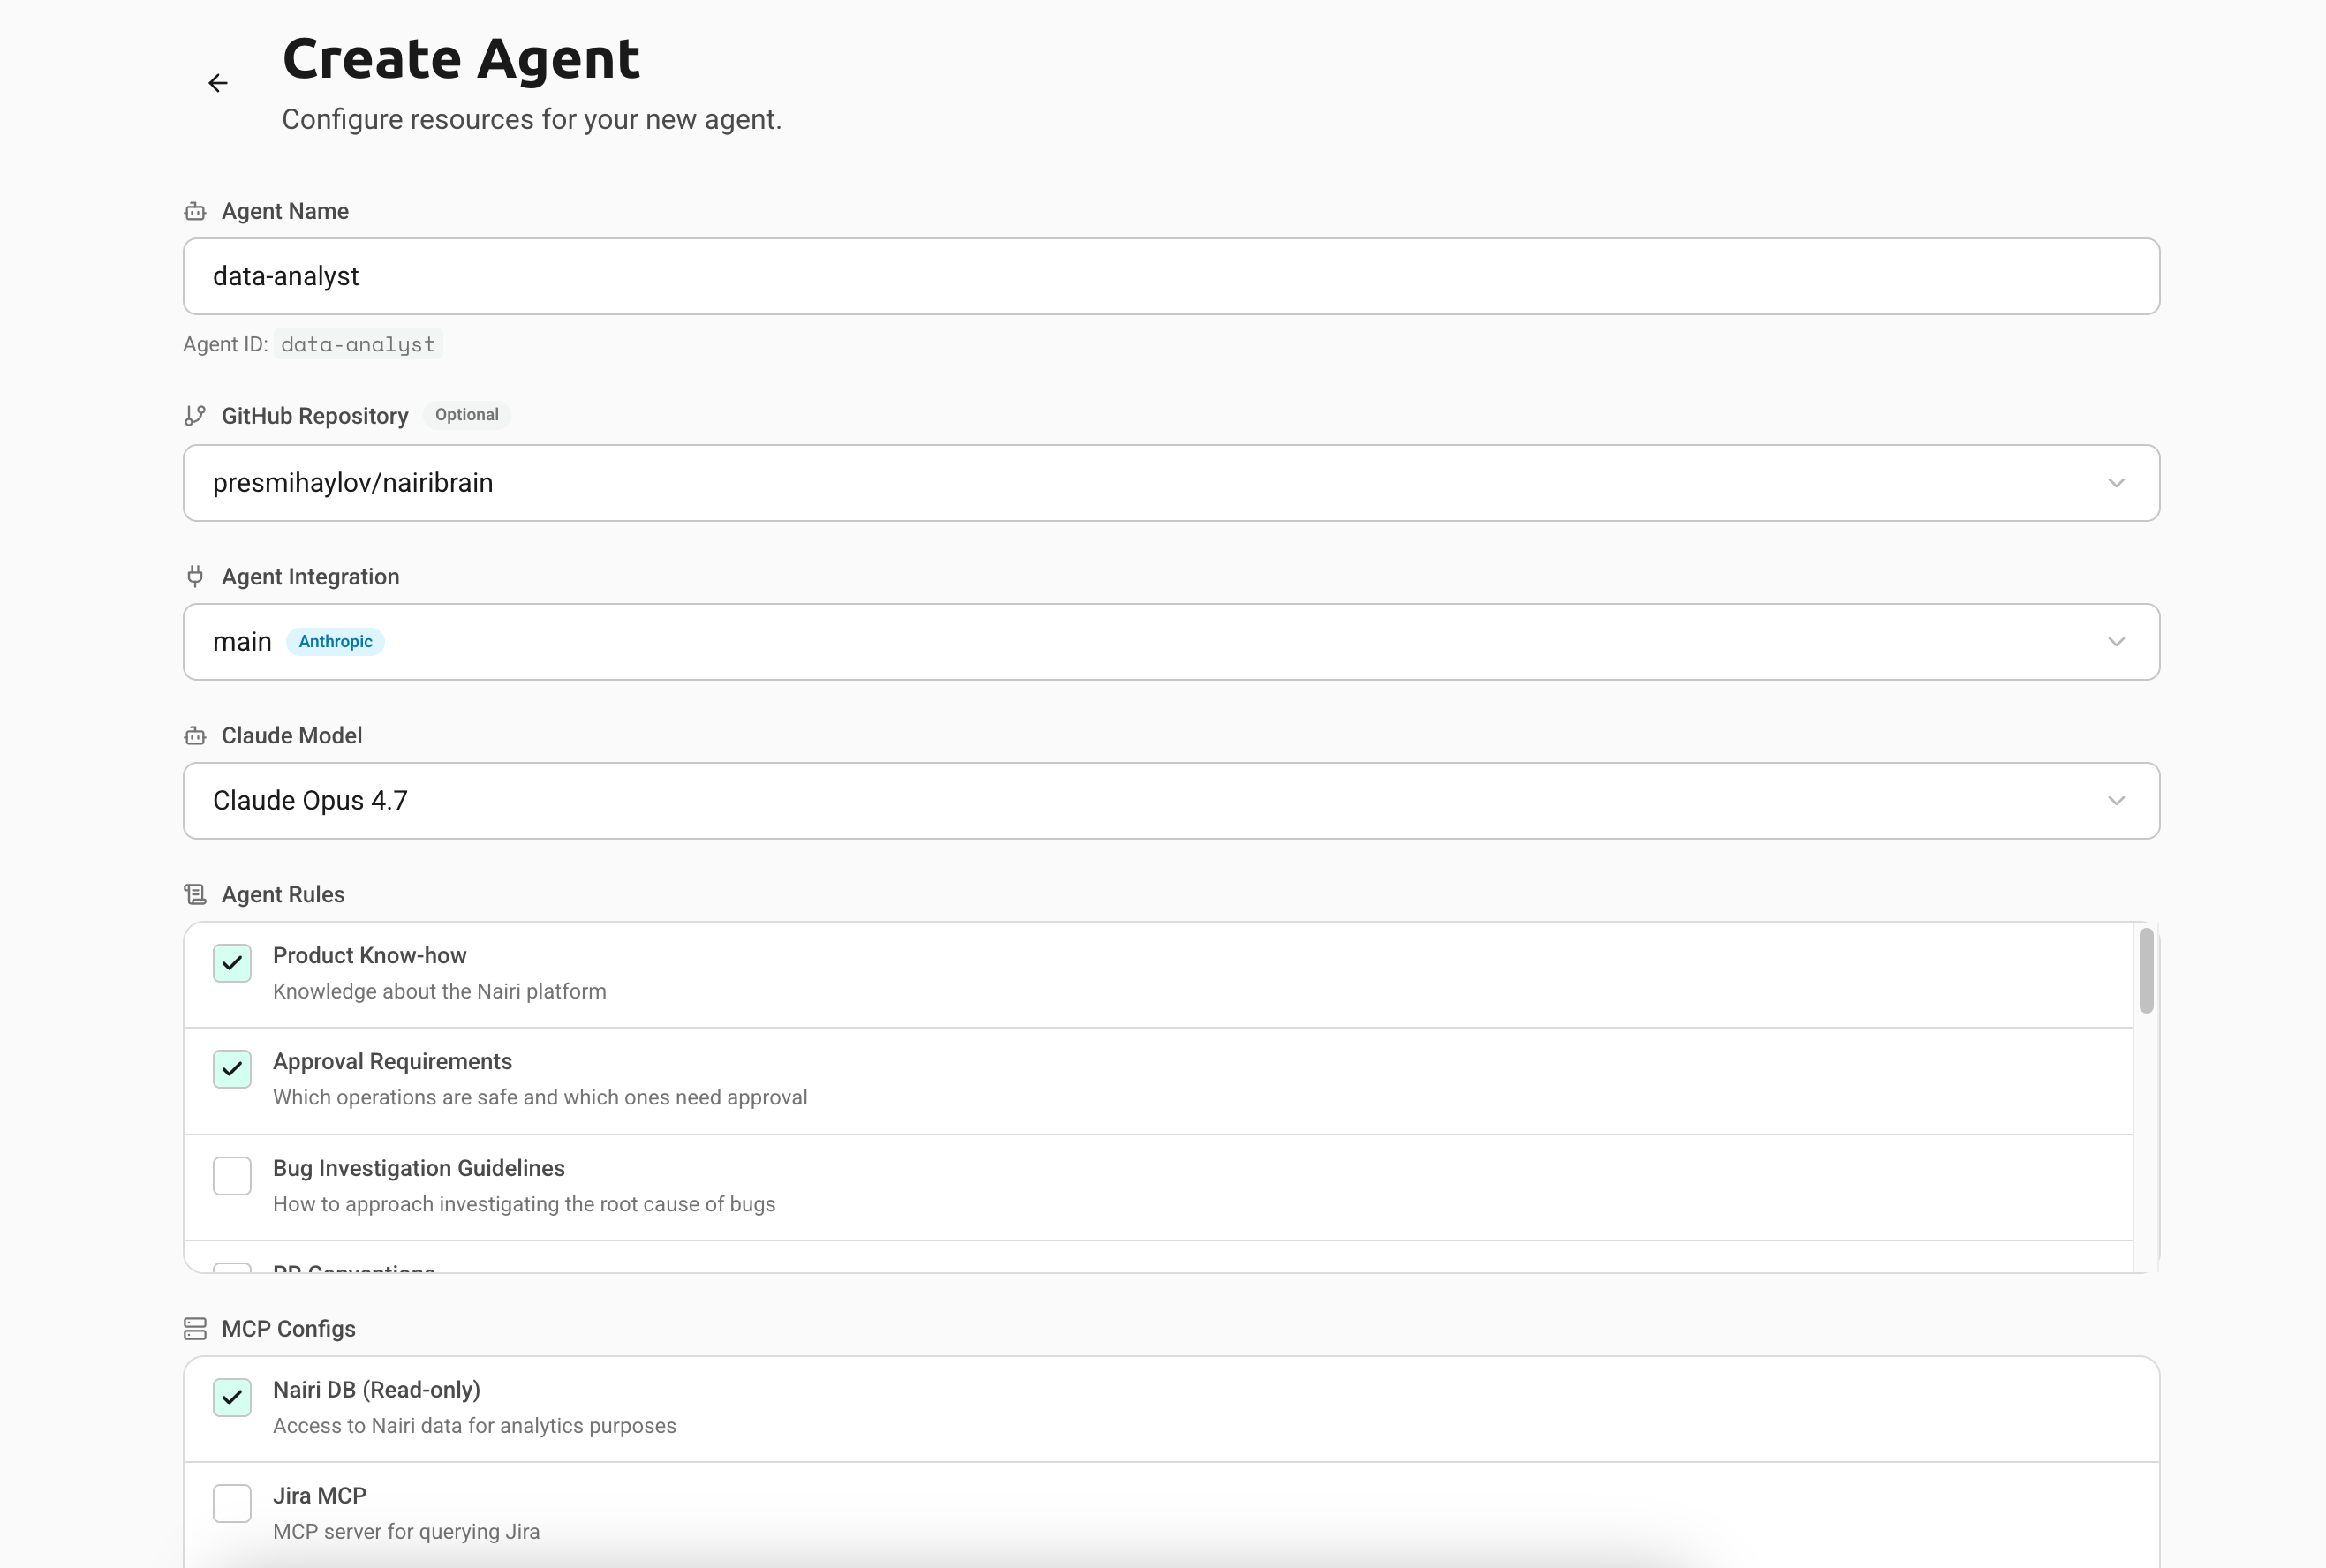
Hosting
- Managed - Nairi runs the agent for you. This is the default.
- Self-hosted - run the agent on your own infrastructure. Free and unlimited on every plan. See Self-hosting Nairi.
Required fields
- Name - also the agent's ID. This is how you address it from Slack (
@<name>), Discord, and the API. Pick something short and unique. - LLM integration - pick from the providers you connected in Step 1.
Optional fields
- Repository - a code repo (for PR work) or a configuration repo (for skills/MCPs/
AGENTS.md). Leave blank if neither applies. - Rules, skills, MCPs - attach anything you set up in Step 2.
- Environment variables - attach a vault for secrets like API keys.
- System prompt - pre-filled with a default tuned for Nairi. Leave it alone unless you have a specific reason to change it.
Click Deploy and wait for the agent to come online.
Step 4 - Talk to your agent
Once the agent is live, prompt it from any of:
- Web app - open Tasks. See Web app.
- Slack or Discord - mention it:
@<agent-name> <your prompt>. See Slack & Discord. - API - see API.
The full transcript - including tool calls - is always available under Tasks.
What to try next
- Set up a scheduled job so the agent runs on a cron.
- Share an agent with teammates or the public.
- Read the use-case playbooks for end-to-end deployments.
Related articles
Can't find what you're looking for? Email support@nairi.ai.
What is Nairi?
What Nairi is, who it is built for, and how the platform's architecture connects chat, agents, secrets, and tools into a deployable runtime.
Plans & pricing at a glance
What each Nairi tier includes, how token usage is metered against your LLM provider, and how billing and seat allocation work across your team.